This allowed export of complex Polygons to Protel Autotrax/Easytrax format, which only supports lines and rectangular solid fills.
Because the cross hatching routine is just another plugin, the command can be applied to any polygon in a layout, if the need arises.
The command is invoked with the usual colon typed at the keyboard, followed by the command
i.e. ":PolyHatch(interactive)"
To use the command, you need to have a polygon or polygons selected. Here, we are using a layout with open hardware logos to demonstrate:
First, you need to select a polygon to crosshatch. Here, we select a logo on the top silkscreen layer:
After issuing the command
:PolyHatch(interactive)
the interactive dialog window appears:
The dialog allows the hatching style, clearances and spacing to be specified:
After hitting OK, the polygon will be crosshatched using the currently selected layer (in this example "Top component" copper), and the new cross hatched version of the polygon will appear in addition to the original polygon:
The still selected, original polygon can be deleted, leaving the cross hatched version. Note that the cross hatching has appeared on the currently selected top component copper layer, not the top silk layer of the original polygon:
Multiple polygons can be selected for simultaneous conversion, i.e:
Note also that we have switched the active layer to the Ground plane layer. We now invoke the :PolyHatch(interactive) command again
After deleting the selected original polygons which are not needed, we now find the cross hatched versions on the ground plane:
Free fills or copper pours are a more typical target for the PolyHatch cross hatching function.
Here is a top copper polygon drawn over a DIP footprint with some additional tracks with associated clearances:
The polygon is selected, and the :PolyHatch(interactive) command invoked:
After deleting the original selected polygon, we are left with a cross hatched ground plane:
It is worth noting that the "Rubberband" tracks placed with rubber band mode contain arcs, and that these arcs have had their clearances preserved, i.e. pcb-rnd, like gEDA PCB, supports DRC for arcs on copper layer.
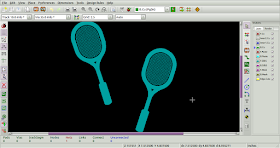
In addition to facilitating export to legacy formats such as Protel Autotrax/Easytrax, the PolyHatch plugin is likely to be useful for creating capacitative sensors on PCB layouts, as well as facilitating more creative designs, i.e.
For those using Kicad, and lacking an easy means of crosshatching a polygon for use as a capacitative sensor or to modify transmission line impedance, pcb-rnd can load and export Kicad format layouts, greatly simplifying this task.
The above tennis racquets can be saved in Kicad s-expression format quite easily. The only caveat is that Kicad does not support arcs on copper, which were used for the racquet frames. After shifting the racquets to the silk layer (to get around Kicad's limitations with arcs) the layout can be exported with "File:Save As"
and then saved as a Kicad s-expression format layout
after which, the layout can be viewed in Kicad's pcbnew layout editor, complete with cross hatched polygons:


No comments:
Post a Comment